
The standard is six inches of fall within the first ten feet from the foundation. That is roughly a 5 percent slope, and it comes straight out of the International Residential Code.
Almost no house maintains it for long. Backfill settles, mulch gets added year after year, patios go in, flower beds build up, and thirty years later the ground that once shed water away from the house now quietly directs it toward the wall.
Grading is one of the two highest-value drainage fixes available to a homeowner, alongside downspout extensions. It is also the one people are most likely to look at, decide “that looks about level,” and move on. It usually is not.
The standard, precisely
IRC R401.3 requires the ground to fall a minimum of 6 inches within the first 10 feet measured perpendicular to the wall.
Where property lines, walls, or slopes prevent that, the code allows drains or swales sloped at a minimum of 2 percent away from the building instead.
Two additional rules matter just as much:
Soil must sit at least 6 inches below the bottom of any siding, and 4 inches below brick or masonry veneer weep holes. Burying siding causes rot, invites termites and carpenter ants, and creates a direct moisture path into the wall assembly.
Beyond the first 10 feet, a gentler continuing slope of 1 to 2 percent is enough. The steep part is the critical zone.
Why the first ten feet matter so much
When your house was built, the excavation was dug wider than the foundation. After the walls went up, the gap was backfilled with the soil that came out.
That backfill is looser and more permeable than the surrounding undisturbed ground, permanently. Water preferentially percolates down through it, so the trench around your house behaves like a bathtub that fills faster than it drains. This is the clay bowl effect.
Grading exists to keep water from entering that bathtub in the first place. Once water gets into the backfill zone, it saturates the soil, builds hydrostatic pressure against the walls, and eventually finds its way through the concrete.
Correct grading is upstream of everything else. It costs a fraction of a drainage system and it reduces the load on every other part of the water management system, including your sump pump.
How to measure yours
Do not judge by eye. The eye is unreliable on gentle slopes, and “it looks fine” is how negative grading survives for decades.
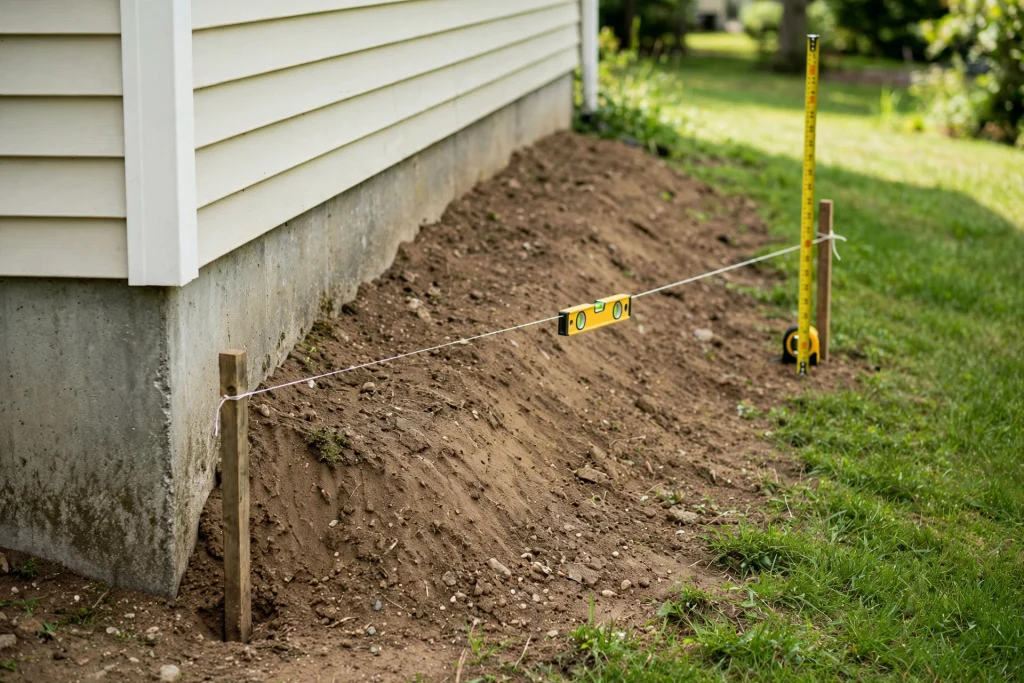
The string line method
What you need: two stakes, mason’s line, a line level ($5), a tape measure.
- Drive a stake into the ground against the foundation.
- Drive a second stake exactly 10 feet out, perpendicular to the wall.
- Tie the string at ground level on the foundation stake.
- Run it to the outer stake, hang the line level in the middle, and adjust the string at the outer stake until the bubble reads level.
- Measure from the string down to the ground at the outer stake.
That measurement is your fall. Six inches or more, you are fine. Three inches, marginal. Zero or negative, water is running to your house.
Repeat at four to six points around the perimeter, especially at corners, under downspouts, and anywhere the basement has been damp.
Quicker alternatives
Board and level. Rest a straight 8 or 10 foot board on the ground at the foundation, level it with a spirit level, and measure the gap under the far end.
Laser level. Fastest and most accurate if you own one.
The rain test. Not a measurement, but the truth. Go outside during a heavy downpour and watch. Water pooling against the wall, running along the foundation, or standing in a low spot tells you everything a tape measure would.
Why grading goes bad
Backfill settlement. The loose soil around the foundation compacts over years and decades. What the builder graded correctly in 1988 has since dropped several inches.
Mulch accumulation. Two inches of fresh mulch every spring for fifteen years is thirty inches of added material, and it builds a berm that holds water against the wall.
Added topsoil and landscaping. Raised beds and new plantings against the house are the most common deliberate cause.
Hardscape. Patios, walkways, and driveways installed level or pitched the wrong way. Concrete also settles and can tilt back toward the house.
Erosion. Downspout discharge, roof drip lines, and surface runoff cut channels and remove soil.
Utility trenches. Any line run to the house created a backfilled trench that settles later, often forming a channel that funnels water straight to the wall.
New construction nearby. A neighbour’s regrading, a new driveway, or a new structure can change how water moves across your lot.
How to fix it
Choose the right soil
Use compactable soil with clay content. Fill dirt, or a clay-loam mix.
Do not use topsoil or sand. Both are highly permeable, so water runs straight through them and reaches the foundation anyway. You have built a slope that looks right and drains directly downward.
The standard approach is compactable fill for the bulk of the slope, with a thin two-inch layer of topsoil on top only where grass needs to grow.
Compact in lifts
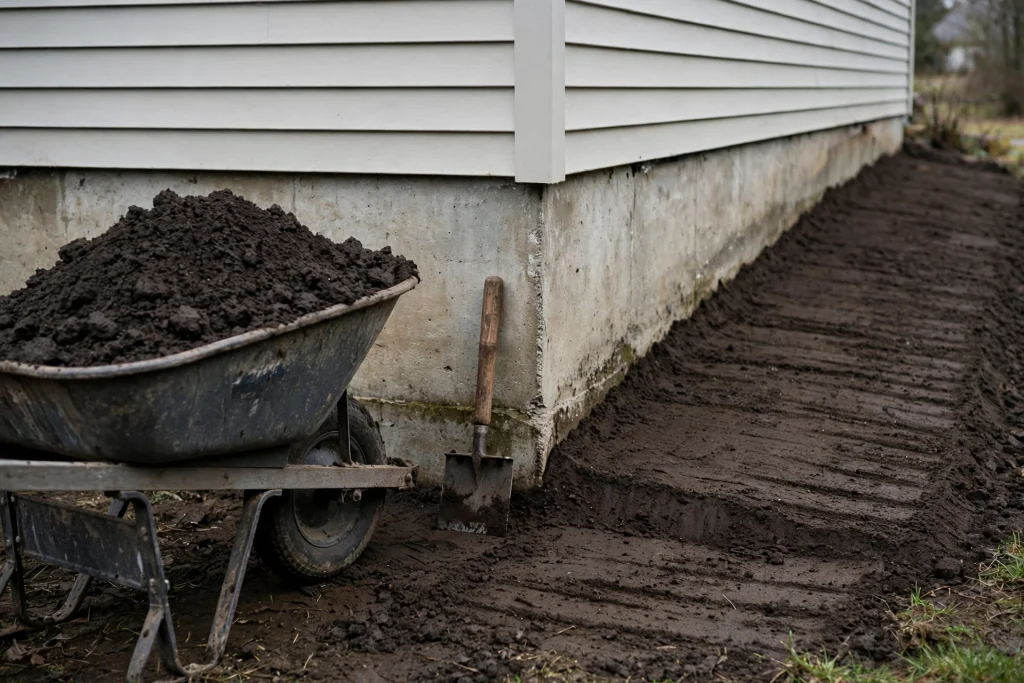
Add soil in layers of four to six inches and compact each layer before adding the next. A hand tamper works for small areas; rent a plate compactor for anything larger.
Uncompacted fill settles within a year or two and you are back where you started.
Respect the clearances
Keep soil 6 inches below the bottom of siding. This is not optional. If achieving 6 inches of fall would bury your siding, you cannot simply add more soil, and you need one of the alternatives below.
Keep masonry weep holes clear, at least 4 inches above grade.
Never bury the sill plate where the wood framing meets the foundation.
Shape it properly
The steepest part should be right at the wall, easing out as it goes. A smooth, continuous fall, not a hump followed by a dip.
Do not create a berm at the outer edge that traps water in a trough against the house, which is a surprisingly common outcome of a well-intentioned DIY job.
Deal with the hardscape
Patios and walkways adjacent to the house should pitch away at 1/4 inch per foot, roughly 2 percent. A patio that pitches back toward the house negates all the grading around it.
Concrete that has settled the wrong way can sometimes be lifted with mudjacking or polyurethane foam injection, generally $3 to $25 per square foot, which is far cheaper than replacement.
When you cannot achieve the slope
Sometimes the site does not allow it: a property line too close, a neighbouring structure, a hill behind the house, or siding already too low.
A swale. A shallow, gently sloped channel running parallel to the house at some distance, intercepting surface water and carrying it away. Effectively a graded ditch, and often the most elegant solution on a tight lot. Minimum 2 percent slope along the swale.
A curtain drain. A french drain installed uphill of the house, intercepting water moving downslope through the soil before it reaches the foundation.
A catch basin and drain line. For a low spot that cannot be filled, a grated basin collecting water and piping it away to daylight.
A trench drain across a driveway or walkway that slopes toward the house.
Retaining walls to hold back higher ground, with proper drainage behind them.
Impermeable capping. A layer of compacted clay or a buried membrane in the first few feet, sloped away, that sheds water even where you cannot achieve much height difference.
Common mistakes
Using topsoil for the slope. It looks correct and drains straight down.
Piling mulch against the foundation. It holds moisture against the wall and against your siding.
Decorative rock without a properly graded and shaded base. The rock does not slope water away by itself; the soil beneath it does the work.
Burying siding to achieve the slope. Causes rot and pest entry, and often fails inspection at sale.
Sprinkler heads spraying the foundation. A remarkably common cause of chronic foundation moisture, and free to fix.
Flower beds ringed with edging. The edging turns the bed into a basin that holds water against the wall.
Ignoring where the water goes next. Sloping water away from the house and into a low spot ten feet out just relocates the problem.
Grading over the downspout discharge. The two fixes work together, and correcting one while ignoring the other leaves most of the water in place.
Cost
| Scope | Typical range |
|---|---|
| DIY, one problem area, materials | $100 to $400 |
| DIY, full perimeter | $400 to $1,200 |
| Professional regrading, partial | $500 to $1,500 |
| Professional regrading, full perimeter | $1,500 to $5,000 |
| Swale construction | $1,000 to $4,000 |
| Catch basin and drain line | $1,500 to $5,000 |
| Lifting settled concrete | $3 to $25 per sq ft |
Fill soil typically runs $15 to $50 per cubic yard delivered. A 10 foot wide strip along 40 feet of wall needing 4 inches of average added depth is roughly 5 cubic yards.
Compare any of these to $8,000 to $20,000 for an interior drainage system, and the sequencing argument makes itself.
Frequently asked questions
How much slope is enough? Six inches of fall in the first ten feet, about 5 percent. Where that is impossible, 2 percent minimum with a swale or drain.
Can I just add mulch to build up the slope? No. Mulch is loose, permeable, and decomposes. It holds moisture against the wall rather than shedding it, and repeated additions build a berm that makes things worse.
What soil should I use? Compactable fill with clay content. Topsoil and sand are too permeable. Put topsoil only in a thin surface layer where grass must grow.
How close can soil be to my siding? At least 6 inches below the bottom edge of siding, 4 inches below masonry weep holes. Never against the sill plate.
My patio slopes toward the house. What can I do? Lifting with mudjacking or polyurethane foam injection is often possible. Otherwise, a trench drain at the house edge, or replacement. Do not ignore it, because it undoes the grading around it.
Will fixing the grading stop my basement leaking? Frequently, yes, particularly in combination with downspout extensions. It will not fix a high water table, a failed footing drain, or a structural crack, but it is the correct first step and it costs a small fraction of those repairs.
How often should I check the grading? Every couple of years, and after any landscaping work, utility trenching, or hardscape installation. Also any time the basement shows new signs of moisture.
Does grading matter in winter? Yes, and arguably more. Frozen ground cannot absorb meltwater, so everything runs across the surface. Negative grading during spring thaw delivers meltwater straight to the foundation.
Should I do grading or drainage first? Grading and downspouts first, always. They are cheaper by an order of magnitude and they remove water at the source. Only move to a drainage system when those are genuinely done and the basement is still wet.
The bottom line
Six inches in ten feet. Take twenty minutes, two stakes, and a $5 line level and measure it at four points around your house, because eyes are unreliable on a 5 percent slope and settled backfill is nearly universal in older homes.
If it comes up short, fix it with compactable fill rather than topsoil, compact it in layers, and keep the soil well below your siding. Then go out in the next heavy rain and watch. Water heading away from the house is worth a great deal more than any product you can buy for the inside of a basement wall.