
Water is coming through a crack in your basement wall. You have two obvious options in front of you: a $12 tub of hydraulic cement from the hardware store, or a $500 injection job from a contractor.
The forty-fold price difference is not a scam, and it is also not always justified. These two products do fundamentally different things, and there are situations where the cheap one is genuinely correct and situations where it is a waste of an afternoon.
The distinction comes down to one thing: hydraulic cement seals the surface of the wall, injection fills the wall. Everything else follows from that.
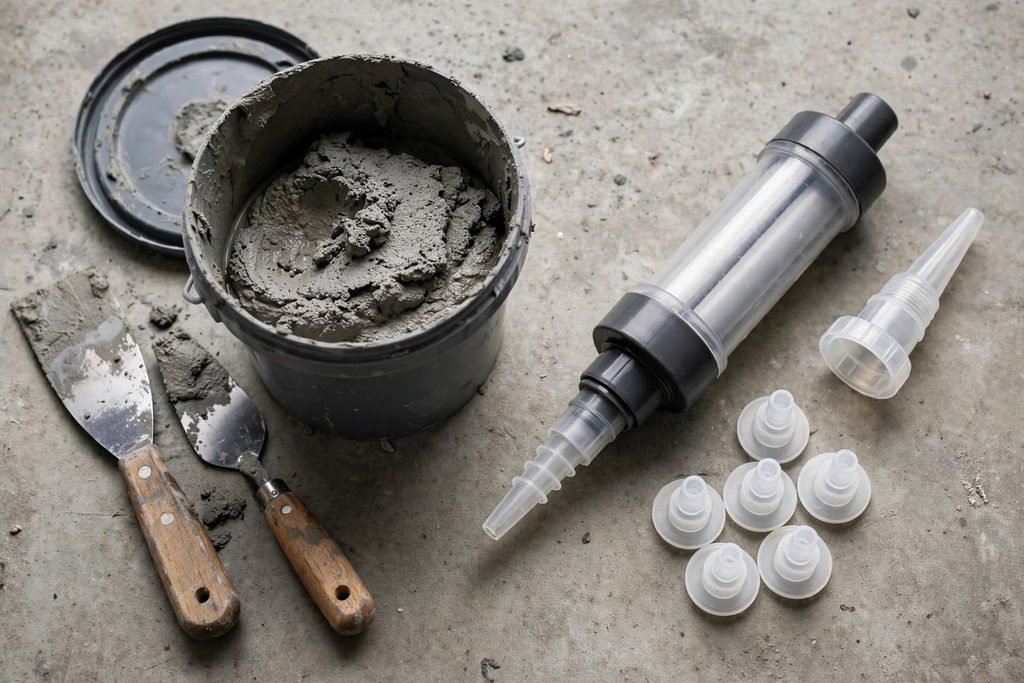
The core difference
Picture a crack in an eight-inch-thick concrete wall. That crack is not a line on a surface. It is a slot running the full eight inches from soil to basement.
Hydraulic cement is troweled into the opening at the interior face. It fills perhaps the outer half inch to inch. The remaining seven inches of the crack are still open, still filling with water, and still pressurizing against the back of your patch.
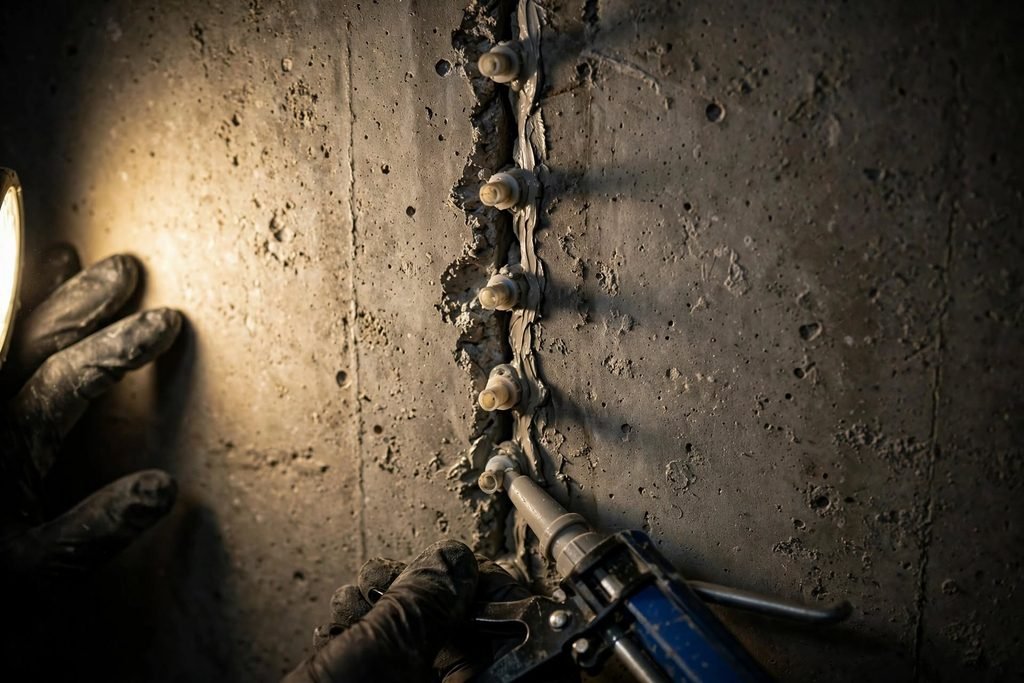
Injection delivers liquid resin under pressure through ports mounted on the surface, and the resin travels through the crack to the far side of the wall. When it cures, the crack is filled across its whole depth, and in the case of polyurethane, the foam pushes out into the soil side and forms a seal there too.
One is a plug at the end of a pipe. The other fills the pipe.
Hydraulic cement
What it is
A rapid-setting cement compound containing accelerators. Mixed with water, it begins setting in three to five minutes and expands slightly as it cures, which is what wedges it into an opening.
Its defining trick is that it sets underwater and against flowing water. Ordinary patching compounds wash out before they cure. Hydraulic cement does not, which makes it the only practical option when water is actively running.
Where it genuinely excels
Stopping an active gushing leak right now. During a storm, with water pouring through a crack or a pipe penetration, hydraulic cement is the correct tool. Nothing else stops flowing water that fast.
Pipe and conduit penetrations. Sealing the annular gap around a service pipe passing through the foundation wall is exactly what it is good at. This is not a moving joint, and the seal is genuinely appropriate.
Filling large voids and honeycombing. Where concrete was poorly consolidated and left a gravelly void, hydraulic cement fills volume effectively.
Tie holes. The small holes left when form ties were snapped off after a poured wall was stripped. Rigid, non-moving, and a good match.
Temporary control while you plan. Buying two weeks to schedule a proper repair is a legitimate use.
Where it fails
On any crack that moves. Hydraulic cement is rigid and it does not bond well to old, cured concrete. When the wall shifts even slightly with seasonal soil cycling, the patch does not flex. It debonds, and the leak reappears, usually right at the edge of the repair.
Against hydrostatic pressure. Water accumulating in the still-open seven inches behind the patch builds pressure. Because the patch is on the low-pressure side, that pressure works to push it off. Homeowners commonly report a patch lasting one season.
Long term on structural cracks. It provides no structural bond. A crack sealed with hydraulic cement is still a crack, mechanically speaking.
As a substitute for diagnosis. It hides the crack, which means you can no longer monitor whether it is growing.
Cost and effort
$8 to $20 per tub. A single crack is an hour of work. The chief cost is that if it fails, and on a moving crack it usually does within a year or two, you now have to grind the cement out before an injection contractor can do the job properly, which they will charge for.
Crack injection
How it works
- The crack face is cleaned and any loose material removed.
- Plastic surface ports are glued along the crack, typically every six to eight inches.
- The crack face between the ports is sealed with a fast-setting surface paste, so resin cannot escape forward.
- Resin is injected under pressure into the lowest port until it appears at the next port up, confirming travel through the crack.
- The injector moves up port by port, filling progressively.
- After curing, the ports and surface seal are ground off.
The result is a crack filled through the full wall thickness. With polyurethane, the foam typically extrudes slightly into the soil behind the wall, forming an exterior-side seal as well, which is the closest you can get to exterior waterproofing without excavating.
The two resins
Polyurethane reacts with water and foams, expanding many times its liquid volume. It cures flexible, so it tolerates the small seasonal movements that destroy rigid repairs. It works in wet cracks and actively leaking cracks, which is a substantial practical advantage since basement cracks are wet almost by definition. This is the standard choice when the goal is stopping water.
Epoxy cures rigid and forms a bond stronger than the surrounding concrete, effectively welding the two sides of the crack back together. It is the correct choice where structural continuity needs restoring. It requires a dry, clean crack, it cures slowly, and because it is rigid, any subsequent wall movement cracks the concrete alongside the repair rather than at it.
For a typical leaking vertical crack in a residential basement, polyurethane is the usual answer.
Where injection excels
Vertical and diagonal cracks in poured concrete walls. This is what the technique was designed for and where it performs best.
Leaking cracks that need to stay sealed. Full-depth fill with a flexible resin survives seasonal movement.
Cracks in walls where you cannot excavate. Injection reaches the exterior side without digging.
Situations needing a warranty. Most professional injection work carries a lifetime warranty against that specific crack leaking again, which hydraulic cement obviously does not.
Where it does not apply
Concrete block walls. Injection works in solid poured concrete. In hollow block, resin disappears into the cores rather than filling a defined crack. Block wall leaks are handled with interior drainage, core weep holes, and exterior treatment instead.
Horizontal cracks and bowing walls. Injecting a horizontal crack seals the water and does nothing about the soil pressure that is bending the wall. It also hides the movement you should be measuring. Structural reinforcement comes first.
Cove joint leaks. Water entering at the wall-floor joint is coming from under the slab under pressure. Injection along that joint typically just relocates the leak a few feet. Interior drainage is the answer.
Very wide or actively moving cracks. Ongoing settlement needs the footing stabilized before the crack is worth sealing.
Cost
Professional: $400 to $900 per crack, varying with length, width, and access. Most of that is labour and warranty, not material.
DIY kits: $60 to $150, containing resin, ports, surface sealer, and a dispensing gun. They work acceptably on straightforward vertical cracks in poured walls. The common failure modes are rushing the injection so the resin does not travel the full depth, and inadequate surface sealing so resin escapes forward instead of penetrating.
Side by side
| Hydraulic cement | Crack injection | |
|---|---|---|
| Depth sealed | Surface only, under 1 inch | Full wall thickness |
| Flexible? | No, rigid | Polyurethane yes, epoxy no |
| Works on wet cracks | Yes, its main strength | Polyurethane yes, epoxy no |
| Stops active flowing water | Immediately | Polyurethane yes, slower |
| Handles hydrostatic pressure | Poorly | Well |
| Structural bond | None | Epoxy yes, polyurethane no |
| Works in block walls | For localized spots | No |
| Warranty available | No | Commonly lifetime |
| DIY difficulty | Easy | Moderate |
| Cost | $8 to $20 | $60 to $150 DIY, $400 to $900 pro |
| Typical lifespan on a moving crack | 1 to 3 years | Permanent if correctly done |
Choosing between them
Use hydraulic cement when:
- Water is actively pouring in right now and you need it stopped today
- You are sealing around a pipe penetration
- You are filling honeycombing, a form tie hole, or a void
- You need a temporary measure while arranging a proper repair
Use injection when:
- You have a vertical or diagonal crack in a poured concrete wall that leaks
- You want the repair to last and to carry a warranty
- The crack has shown minor seasonal movement, which calls for flexible polyurethane
- Structural continuity needs restoring, which calls for epoxy
Use neither, and do something else, when:
- The crack is horizontal or the wall is bowing. Reinforcement first.
- Water enters at the wall-floor joint or up through the floor. Interior drainage.
- The wall is concrete block. Drainage and drilled weep holes.
- The crack is actively growing from ongoing settlement. Stabilize the footing.
The step almost everyone skips
Whichever product you choose, it is treating a symptom. Water reached that crack because of something happening outside the house, and if that continues, you are managing a permanent condition rather than fixing it.
Before or immediately after any crack repair:
Clean the gutters and confirm they are pitched correctly. Overflowing gutters deliver a curtain of water into a narrow strip against the wall.
Extend every downspout six to ten feet from the foundation. A downspout discharging at the base of the wall concentrates hundreds of gallons into the backfill zone during a single storm. This is the highest-value fix available and it costs under $40 per downspout.
Check the grading. Soil should fall at least six inches over the first ten feet from the house. Backfill settles over decades, and yards that once drained away often now drain toward the building.
Cover the window wells and clear the gravel at their bases.
A crack repaired with a $700 injection while a downspout continues to dump against that exact spot is a repair working under maximum load for no reason. The next crack a few feet over is on its way.
Frequently asked questions
Can I inject over an old hydraulic cement patch? Not effectively. The patch has to be ground out first so resin can reach the crack, and most contractors charge for that preparation. This is the practical argument against trying hydraulic cement first on a crack that clearly needs injection.
How long does hydraulic cement last on a foundation crack? On a stationary, low-pressure situation like a pipe penetration, indefinitely. On a crack that moves seasonally or sits under hydrostatic pressure, commonly one to three years before it debonds or the leak reappears at the patch edge.
Is DIY injection worth trying? On a simple vertical crack in a poured wall with reasonable access, yes. Read the instructions fully before starting, inject slowly, and do not move to the next port until resin appears there. The main risk is a partial fill that leaks later and complicates a professional repair.
Which resin should I use for a leaking crack? Polyurethane in most cases. It handles wet conditions, it foams to fill irregular voids, and it stays flexible. Epoxy is for structural bonding in a dry crack.
Will injection work if my crack is actively leaking during the repair? Polyurethane will. It reacts with water, so moisture accelerates the foaming. Epoxy will not bond properly to wet concrete.
Does injection fix the structural problem? Epoxy restores tensile continuity across a crack, which is a genuine structural function. Neither resin addresses a wall that is bowing or a footing that is settling. Those need reinforcement or underpinning.
Can I use hydraulic cement on the outside of the wall? Yes, and it works considerably better there because it is on the positive pressure side, with water pushing it against the wall rather than off it. The catch is you have to excavate to reach it.
What about waterproof paint over the crack? It fails against pressure, peels in sheets, and hides the crack so you cannot monitor movement. It has a narrow legitimate use on walls that are only mildly damp with no active seepage.
The bottom line
Hydraulic cement is an emergency tool and a void filler. When water is coming in right now, when you are sealing around a pipe, when you are packing a tie hole, it is the correct product and it costs twelve dollars.
Injection is the repair. It fills the crack through the full thickness of the wall, and polyurethane stays flexible enough to survive the seasonal movement that shears rigid patches off.
Judge by whether the crack moves and whether pressure is behind it. Stationary and dry, cement is fine. Moving and wet, only injection lasts. And either way, go outside and look at what the downspout above that crack is doing, because that is where the actual fix usually starts.