
Most sump pumps fail silently. They sit in a hole in the corner of the basement for years, and the owner discovers the problem at 2 a.m. during the exact storm the pump existed to handle.
This is entirely preventable. Ten minutes, four times a year, with a bucket of water, catches the large majority of failures while they are still cheap and convenient to fix. It is one of the highest-return maintenance tasks in a house, and almost nobody does it.
Here is the full protocol: a quick quarterly test, a deeper annual service, and the specific things to look for at each step.
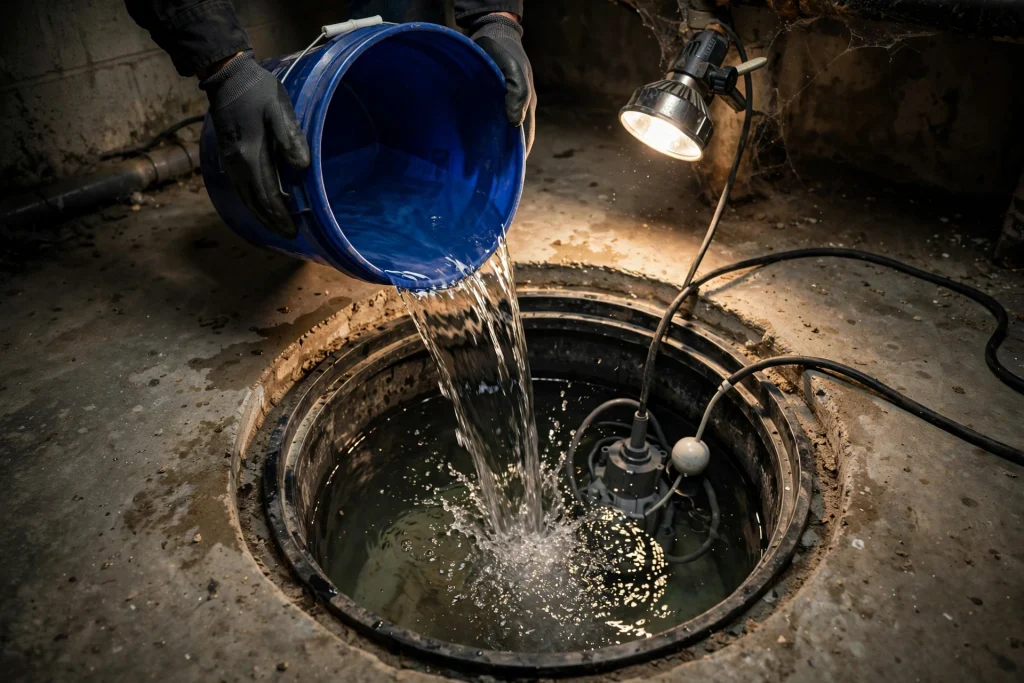
The quarterly test: 10 minutes
Do this four times a year. Set a recurring calendar reminder, because the whole reason pumps fail unnoticed is that nothing prompts you to look.
Step 1: Look before you touch
Lift the pit lid and shine a light in. Note:
- The current water level
- Whether the pump is sitting upright and stable
- Whether the float has anything near it that could snag
- Silt, gravel, or debris in the bottom of the pit
- Any visible rust on the pump housing
- The condition of the power cord
Step 2: Confirm power
Check that the pump is plugged in. This sounds insulting and it is one of the more common causes of failure, because the outlet gets borrowed for a shop vac or a dehumidifier and never restored.
If the outlet is a GFCI, press the test and reset buttons to confirm it functions. Check that the breaker is on.
Important: a sump pump should be on its own dedicated circuit and should not share an outlet with anything else. Piggyback plugs, where the pump plugs into the back of the float switch plug, are standard and normal.
Step 3: Pour water in
Fill a five-gallon bucket and pour it steadily into the pit. Pour into the pit itself, not directly onto the pump or the float.
You may need more than one bucket if the pit is large or currently low. Keep pouring until the float rises to its activation point.
Why not just lift the float by hand? Lifting the float confirms the switch and the motor work, but it does not confirm the pump actually moves water at a realistic level, and it does not test the check valve or the draw-down. Water is the honest test. Lifting the float by hand is an acceptable quick check but not a substitute.
Step 4: Watch and listen
The pump should activate within a few seconds of the float reaching its set point. Then:
Listen for: a smooth hum. Grinding, rattling, screeching, or a strained note all indicate a problem, usually a clogged or worn impeller or failing bearings.
Watch for: the water level dropping steadily. It should empty the pit in roughly 10 to 30 seconds depending on pit size.
Feel for: excessive vibration. A pump walking around the pit floor is a warning sign.
Step 5: Check the outside
While the pump is running, go outside and confirm water is actually exiting the discharge outlet.
This step gets skipped and it is the one that catches blocked, frozen, disconnected, or crushed discharge lines. A pump that runs perfectly and discharges into a blocked pipe is a pump that will not save your basement.
Also confirm the water is landing at least 10 feet from the foundation and flowing away. Discharge water soaking in near the wall returns to the pit, which is a common reason a sump pump runs continuously without ever emptying.
Step 6: Watch the shutoff
The pump should stop cleanly once the level drops to the cutoff point.
Then keep watching for another 30 seconds. If the water level jumps back up, your check valve has failed. That single observation is the most valuable thing this whole test produces, because a failed check valve short-cycles the pump and dramatically shortens its life.
Step 7: Test the backup
If you have a battery backup, test it properly rather than glancing at the charger light.
Unplug the primary pump, then pour water in and confirm the backup activates and empties the pit. Listen for the alarm if it has one. Then plug the primary back in.
Check the battery’s age. Most need replacement every 3 to 5 years, and a charger light that reads green tells you the battery is receiving charge, not that it can still hold one under load. There is more on this in how long a sump pump battery backup lasts.
The annual service: 30 to 45 minutes
Once a year, do everything above plus the following. Late summer or early autumn is a good time, before the wet season.
Clean the pit
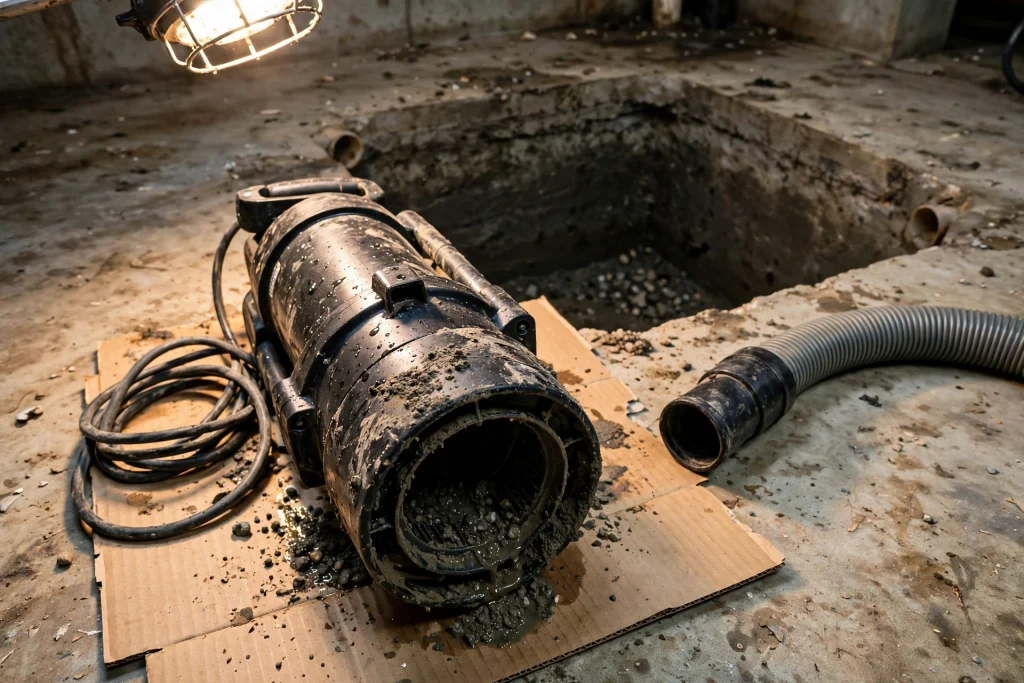
Unplug the pump. Lift it out and set it on a towel or a piece of cardboard.
Scoop out silt, gravel, and debris from the bottom of the pit. A shop vac makes short work of it. Sediment accumulation is the most common cause of impeller clogging and it also reduces effective pit volume.
Clean the pump
Rinse the intake screen or grate. Remove any debris caught around the base. If the pump has an accessible base plate, remove it and check that the impeller spins freely and the vanes are not visibly eroded.
Check the housing for rust, especially at seams and around the cord entry.
Verify the weep hole
Locate the small hole, roughly 3/16 inch, in the discharge pipe just above the pump. Confirm it is clear. This is one of several components worth understanding before you service the system. This hole releases trapped air and prevents airlock, and a blocked one can leave a healthy pump spinning uselessly in an air pocket.
If your installation does not have one, drill it, angled downward so it sprays back into the pit.
Inspect the check valve
Look for corrosion, cracks, or moisture around the fittings. Listen during the test for a single clean clunk when it closes rather than repeated gurgling. Valves are consumables; replacing one preventively at $15 to $40 is trivial compared to the wear a failed one causes.
Walk the discharge line
Follow it from the wall to the outlet. Look for crushing, disconnected joints, sagging sections that hold water, and debris or animal nests at the terminus. Confirm continuous downhill slope so the line drains fully between cycles.
For buried lines, check that the pop-up emitter opens freely.
Check the pit lid
A sealed, gasketed lid reduces basement humidity substantially, blocks soil gases including radon, keeps debris and small objects out, and prevents falls. If yours is a loose sheet of plywood or missing entirely, replace it. An open pit is a continuously evaporating pool feeding humidity into your basement, which matters if you are dealing with a musty smell.
Note the pump’s age
Write the installation date on the pit lid with a permanent marker, or record it somewhere you will find it. Most homeowners have no idea how old their pump is, and age is the single best predictor of failure. See how long do sump pumps last for the replacement thresholds.
Before winter: the cold-weather check
The discharge line is the vulnerability. A pump running against a frozen line overheats and can burn out, and it will not protect you during a thaw.
- Clear the outlet of leaves, mud, and debris
- Confirm the line slopes continuously downhill with no low spots holding water
- Consider an ice guard fitting, a slotted section near the exit that lets water escape if the downstream line freezes
- Disconnect any flexible extension that will trap water
- Confirm the pit lid is sealed
Add this to your broader basement winter preparation routine, since the same visit covers several other items.
What each symptom means
| What you observe during the test | Likely cause |
|---|---|
| Nothing happens at all | No power, tripped GFCI, dead motor, or stuck float |
| Motor hums, water does not move | Airlock, blocked discharge, or clogged impeller |
| Grinding or rattling noise | Debris in impeller, or failing bearings |
| Water level drops very slowly | Worn motor, partial blockage, or undersized pump |
| Level drops, then jumps back up | Failed check valve |
| No water at the outside outlet | Blocked, frozen, or disconnected discharge line |
| Pump will not shut off | Stuck float switch |
| Excessive vibration | Pump not seated properly, or worn bearings |
If a test reveals a problem, the full troubleshooting sequence is here.
Recommended additions
Two upgrades convert testing from something you have to remember into something the system tells you about.
A high-water alarm. A float-triggered alarm that sounds when the pit level rises above normal. Basic units under $30. It will not fix anything, but it will tell you the pump has stopped working while there is still time to act.
A Wi-Fi sump monitor. Units in the $80 to $200 range track water level and pump activity, log history so you can see whether your pump’s cycling frequency is changing, and push a phone alert on high water or pump failure. If you travel, own a second property, or simply want the peace of mind, this is a strong small investment.
Neither replaces the bucket test, because neither confirms the pump can actually move water. They catch failures between tests.
Frequently asked questions
How often should I test my sump pump? Quarterly at minimum, plus a deeper annual service. Also test before any period when heavy rain is forecast, and before leaving on an extended trip.
Can I test it by lifting the float instead of pouring water? It is a reasonable quick check that confirms the switch and motor work. It does not test the check valve, the draw-down, or the pump’s ability to move water at a realistic level. Use water for the real test.
How much water do I need? Usually one five-gallon bucket, sometimes two if the pit is large or starting low. You need enough to raise the level to the float’s activation point.
What if the pump does not turn on? Check the plug, the outlet, and the GFCI first. Then unplug it and check whether the float is jammed against the pit wall, the discharge pipe, or the cord. If those are clear and it still will not run, the switch or the motor has failed.
Is it safe to test a pump myself? Yes, with basic precautions. Do not reach into a pit with the pump plugged in. Unplug before handling the pump or the float. Do not stand in standing water while working on anything electrical.
Should I test the pump when the pit already has water? That is fine, and it means you need less water to reach the activation point. Just make sure you observe the full cycle from activation through shutoff.
My pump has not run in months. Is it broken? Probably not. A dry pit in a dry season is normal in many homes. But it is exactly why you test rather than assume, since a pump that has sat idle can seize. If the pit stays dry even through heavy rain, that raises a separate question covered in why is my sump pit dry.
Should I hire someone to service it? The quarterly test is straightforward homeowner work. A professional service call, typically $100 to $200, makes sense annually if you are not comfortable handling the pump, if the system is complex, or if you want a second opinion on remaining service life.
The bottom line
One bucket, four times a year, and one longer service annually. Pour water in, listen to the motor, watch the level drop, go outside and confirm water is actually coming out, then watch for the level jumping back up after shutoff.
That last observation, the backflow check, is the one most people never make, and a failed check valve is the most common thing quietly destroying sump pumps across the country. Ten minutes on a dry Saturday beats finding out during the storm.
[…] work through the troubleshooting sequence, and test quarterly once it is […]
[…] Test the pump properly. Pour a five-gallon bucket into the pit, confirm it activates, empties, and shuts off cleanly. Then go outside and confirm water is actually exiting the discharge. The full test procedure. […]
[…] Test the sump pump quarterly and replace it on age rather than failure. […]
[…] test the sump pump with a bucket and confirm water exits the discharge […]
[…] Test the sump pump. Pour five gallons in, confirm it runs, empties, and shuts off cleanly, and go outside to verify water actually exits. Full procedure here. […]
[…] Test the sump pump and add a battery backup if you do not have one. […]
[…] A failing primary pump. If the primary is weak, the backup carries more of the load even when power is on, quietly cycling the battery. This is worth ruling out with a proper pump test. […]
[…] that would otherwise have flooded the basement. If you have not run one recently, work through a proper sump pump test, and make sure you have a plan for what to do if the pump fails during a […]
[…] normal in many homes. It does not mean the pump is broken, though it does mean you should be testing it periodically rather than assuming it […]
[…] it does not run, work through the electrical and float checks first. The full test procedure is here, and it should be a quarterly habit regardless of whether the pit ever fills on its […]
[…] Start testing quarterly. Ten minutes with a five-gallon bucket, four times a year, catches most failures while they are still cheap. The full test procedure is here. […]
[…] three months. Pour a five-gallon bucket of water into the pit. Confirm the pump activates, empties the pit, and shuts off cleanly. Listen for unusual grinding or […]